Monday, August 10, 2015

How to Make an Arrahe

Some couples are using unity coins nowadays, but there are still some who uses arrahe. Different designs are also available, most adhering to the wedding's theme. For this reason, I have decided to DIY our arrahe. 

Here's what I did:

Materials Needed:
Ribbons
Glue/glue gun
Scissors
Box 

I bought an abaca box in Divisoria similar to this: 

http://www.rtcrafts.com/handicrafts/packaging/Double-Round-Box--001big.jpg

I just added a flower, some ribbons, lace and pearls. I placed a film inside to make sure that the coins won't slip through. 


Wednesday, July 29, 2015

How to Make a Wedding Cord

The wedding cord was part of my DIY list as well, since I bought an RTW gown. Some of the makers/owners would offer 5,000Php off without the accessories, thus cheaper to make one. 

There are not much inspiration from Pinterest, it took me some time to come up with a design. H2B doesn't want a rosary/beaded cord and the same time, I would still like to incorporate our theme. 

Materials Needed:
Ribbons (lace looks nice as well)
Twist Cord
Glue/glue gun
Scissors
Needle & Thread

1. Measure the length by loosely wrapping it around and adding 5 inches for the knot. If you will be braiding the cord, measurement should be x 3.

2. Tie a loose knot at one end and start braiding the cord. 

3. Once done braiding, gather both ends.
  4. Start sewing to secure the ends together. 

5. Get the middle of the cord to form two loops. Sew the ends in the middle. 

6. Add flowers or ribbons in the end to hide the stitches. 


Our DIY Wedding Cord


Other inspirations here: 
12, 3

Wednesday, July 22, 2015

How to Make Ribbon Wands

I wasn't planning on making ribbon wands. But we learned later on the the church doesn't allow confetti, thus, the wands. 

Materials Needed:
Ribbons (lace looks nice as well)
Sticks (I got mine from the grocery)
Glue/glue gun
Scotch tape
Scissors
Bells (optional) (Wellmanson in Divi)


  1. Tape the end of the ribbon on the back rest of a chair. Wind the ribbon around until you have reached the desired number of strands.
  2.  Cut where the ‘start tape’ is.
  3.  If needed, cut the ribbons in half
  4. Wrap a piece of the ribbon on top of the stick, put some glue and wrap around. If you wanted to add another ribbon, place some glue on the inside of the first ribbon then wrap it around the stick
  5. Insert the bell and tie the ribbons to secure


Notes:
  • There are several shops selling bells in Divisoria, same street as Wellmanson. I got the big bells since they are cheaper and make more noise. Should you get the smaller one, I suggest buying wire loops and attaching 2-3 bells. 
  • I've decided to have longer ribbons based on this picture:
credits to owner


Monday, June 15, 2015

Venue x Date

After the proposal, we don't know how to get started with the wedding planning. We don't have a church in mind, or any specific venue. I wanted to get married on the date of our 10th anniversary, but it would mean 20 months to wait. So here's what we did: we listed down the dates we wanted (based on the holidays, birthdays and other occasions) for this year, then short-listed the churches. We then visited the churches, took pictures and asked around.

We considered the size of the church (we wanted a small one), parking, rules and location.


1 - Small Chapel, Don Bosco Mandaluyong. D's Alma Mater. But they don't hold weddings there. 

2 - Archbishop's Palace, Shaw. D thinks it's too small. But the floor & altar are really beautiful. Gated compound. 
Photo from photosbyging.blogspot.com


3 - Sts. Peter & Paul, Makati. No Sunday weddings.


Photo from www.makaticity.com

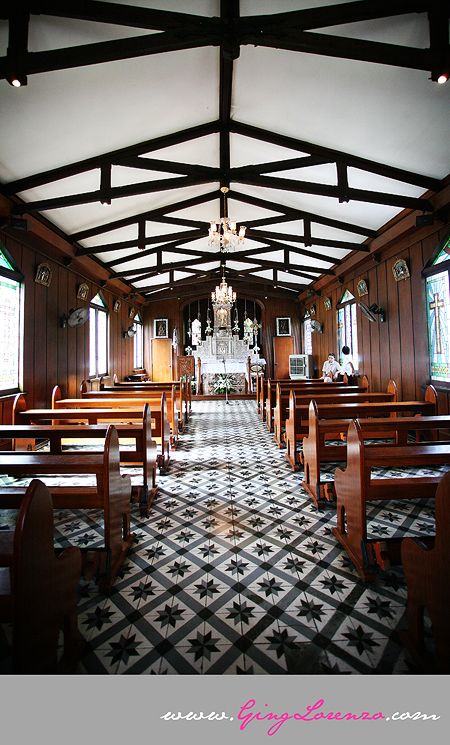
4. Nuestra Senora De Gracia, Makati - no aircon, but the area is gated and the church is beautiful. 

Photo from metromanilachurchceremonyvenues.blogspot.com

5. Chapel on the Hill - Solemn and simple. Though we were thinking that Tagaytay wedding might be more expensive for us.
photo from thescrimpybride.blogspot.com
We booked church #4. 

Saturday, May 16, 2015

Chapters - Introduction

We're 6 months away from the big day when I have decided to start this blog. Initially, I was thinking it would be too tedious to create & maintain one, along with all the preps. However, I have relied on online blogs and forums for the preps and I think it is just right to give something back. And yes, it is a good outlet for emotions. 

One thing though, I barely have pictures of the preps, especially of the food tasting. But I will try to catch up on this. Also, another word of caution: these opinions are mine and your decisions shouldn't be made solely on this blog. I suggest to continue researching and inquiring about your suppliers. I am not responsible for whatever inconsistencies or faults this blog might bring you (I hope with my whole heart that there would be none). And on my side, I can only promise to provide my honest opinion.